Photobucket

Home Is Where The Heart Is

Home Is Where The Heart Is
Available Now!

Robin

Robin
Available now!

Goldie

Goldie
Available now!
Photobucket

Tuesday, June 22, 2010

Hello!

I have a little peek of our new "Garden Friends" limited edition button miniature. "Baby Bug" is resting up on the "I" ;) Available in the shop today 12 noon PST, only 5 will be created.

We are also updating the shop with several new button styles. See some of our new designs below!

                                                                {Who Loves You?}

{Mod Posies}
(Teddy Bear)


I've been creating some really fabulous custom orders this month! Here are just a sampling of my favorites!


We are also working on a line of pendants inspired by our button sets. We have a few already created and we are going to be doing a shop update with them in the next month. Stay tuned for details there. In the mean time here are a couple we will be listing :)

{Iceland Poppies"}
                                                            {Strawberry Fields}

That's it for today! Off to list the new buttons in the shop.  Have a wonderful and creative day!

Monday, June 21, 2010

Monday's Creative Team Spotlight- Bridget!

Bridget chose to work with our "Spring Poppies" buttons for her spotlight this week. I am in love with the sweet little dress she designed for her daughter.  This dress will be worn by cutie pie, Kennedy for her upcoming 2nd birthday!

Bridget says:  "The dress is a heavy white eyelet round yoke dress from my own pattern with poppies inspired from your buttons "growing" from the bottom hem. I made the fabric poppies using the 2 black buttons as centers and attached a large poppy button as a closure for the neckline. I loved the buttons so much I wanted a complete outfit so I used the other large button to make a grosgrain ribbon bow on her headband"

Friday, June 18, 2010

Re-Use, Recyle, Re-Style! A button inspiration tutorial from Amy Priddy

Today we have a fun tutorial by our Creative Team Member, Amy Priddy using recycled supplies to create a fun and functional storage system!  For her project this week, Amy chose to work with our button set called, "Fashion Designer"

Turn an old Crystal Light container into a fun and fabulous tools storage container.

Supplies:
Crystal Light container
Mod Podge;
Tessa Ann Buttons- "Fashion Designer" can be found here
Coordinating thread (optional);
Craft glue;
9 inch x 7 inch piece of fabric, scrapbook paper or wrapping paper;
9 inch long piece of ribbon (any width);
Scissors;
Iron (if using fabric);
Foam Brush


Taking your 9x7 piece of fabric, fold one side of the longest edge 1/4 of an inch under (wrong sides facing) and iron. If using scrapbook paper or wrapping paper, just fold over and press good with your fingers to cause a crease.

Line up the folded edge of your paper or fabric to the bottom of the container and use your finger at the top of the container to measure where to do the top fold.


Fold the fabric or paper over and iron or finger press. If you are using fabric, you can top-stitch the folded edges for a more finished look. Once that is done, fold one of the shortest edges under 1/4 of an inch (wrong sides facing) and press. Three of the four sides should be folded over now.


Remove plastic Crystal Light label from the plastic container. Once label is removed, using your foam brush, brush the Mod Podge directly on to the Crystal Light plastic container. Make sure you get it good from top to bottom. Once the Mod Podge is on, line up the unfolded edge of the fabric or paper with the center of one side of the container. Gently stretch the paper/fabric around the container pulling tight so there are no wrinkles all the way around until you get to where you started. The folded edge should overlap the raw edge a little. Add a little Mod Podge to the end of the fabric (the folded seam) and press with your finger in place.


{OPTIONAL:} You can use Mod Podge to seal the fabric or paper once it is on the container. If using paper, I recommend putting another coat on top of the paper. It is optional with fabric as the Mod Podge will make the fabric stiff.

Once that is done, take your ribbon and seal or treat the ends of the ribbon. You can use either Fray Check or heat sealing it using a lighter. This will prevent the ribbon from fraying. Once that is done, brushMod Podge on the backside of the ribbon. Repeat the lining up process you did for the fabric/paper until the ribbon overlaps like the fabric did. You can place the ribbon anywhere you want on the container. I chose the top portion of the container. Set aside to dry.


{OPTIONAL:}
While that is drying, take your coordinating thread and feed through your button as many times as it takes to get the desired look. Make sure you cut enough thread to leave tails long enough to tie in knots (at least one inch extra for each end). I wound mine around about 4 times for a thicker threaded look. Once you get the look you are going for, tie at the back 2 or 3 times and snip close to knots. Repeat for however many buttons you want to use.


Once the fabric/paper is dry, using your craft glue (I used E-6000), put a small bead on the back of the button and adhere to the ribbon. Repeat for the remainder of the buttons. Once that dries, you are all set! A new storage holder to keep tools handy. Perfect for pens, scissors, rulers, etc.....


Tuesday, June 15, 2010

Limited Edition "Garden Friends"

NEW to The Button Shop! 


We are going start releasing a collector series of "Garden Friends" periodically in the shop. These will be limited edition, made in advance in a limited amount. This is one from our 1st collection.
This little yellow spring chickity will be listed in the shop today at 12 pm PST.
Only 5 will be sold.
A new "Garden Friend" will be released each Tuesday over the next month!

This little yellow chick stands just over 2 inches tall and was created on a 1" handmade button. A little lady bug shares the 1" button with the chick. This little figurine would be an adorable gift or just a little something to brighten your day :)

{6/16/10 UPDATE: This little bird sold out today, check back next Tuesday for the next edition!}

Saturday, June 12, 2010

A custom designed CAKE TOPPER!

This week, I created a custom cake topper inspired by my "Garden Love" button collection. The customer had purchased the set of "Garden Love" as inspiration for her daughters upcoming birthday party and when I posted a cake topper later she just had to have one in her theme
                               
I went with a whimsical tree theme, with falling hearts for the leaves, little lady bugs and long legged blue birds around the base of the topper. On the branch I hand crafted a little wooden sign that I added the personal touch of the child's name and also for fun and to add to the whimy feel on the back side of the sign her name PLUS "Land". This cutie's name is Tatym, so we created "Taytumland"
The topper is super lightweight and stands about 7 inches tall.
The best part.  When her birthday had come and gone, this sweet little topper can be used as a keepsake in her room on a decorative shelf. This will last a lifetime and I know if my mom and dad had something made for me like this when I was a little girl I would have LOVED it :)


{A view from the backside} Cuteness 360 degrees!


I asked the parents if they wanted a personlized message on the bottom of the topper. I hand painted their message and sealed it so it will last forever. 
We are now taking custom orders for ALL types of cake toppers. Birthday's, weddings, baby showers, anniversaries....anything that requires something extra special! If you would like a custom cake topper, please email me to set up your custom order at shoptessann@yahoo.com.

Monday, June 07, 2010

Monday's Creative Team Member Spotlight- Rachel Mason!


The button shop is back home from a lovely week away at the Oregon coast were we reunited with family and had the most wonderful time catching up with them.

It's Monday again and I get to share some gorgeous scrapbooking pages and a great holiday card from our Creative Team member, Rachel Mason! Rachel is using a button set from our Winter Wonderful collection. We will be revamping this button set and listing it in the shop in time for your winter crafting projects very soon!

Enjoy Rachel's inspiring pages!

Rachel is an avid collector of vintage wares. She has a wonderful shop filled with vintage wares at etsy! www.rachiesplace.etsy.com  I bought some pretty pink cups from here that I have filled with buttons for a decoration in the button shop!


Rachel used one of our "peppermint candy" buttons and added sequines to the center to create a gorgeous center for her flower!

We love how Rachel used the peppermint candy button as a pop of color to her super cute page of her and the hubs at Disneyland. Rachel even creatively used a sheet of notebook paper for the base of her scrapbook page! How fun, right?  Oh...don't you just adore those little rhinestone micky mouses! How clever is that!?


~~~~~~~~~~~~~~~~~~~~~~~~~~~~~~~~~~~~~~~~~~~~~~~~~


It's never too early to start thinking about your Christmas cards! This card was created on a kraft cardstock background and to get the great title like Rachel, either use rub-on lettering or stamping to create a fun chunky title. Rachel then embellished the card with our snowman and peppermint candy buttons. We love how she circled her snowman in red rhinestones, creating great visual interest! A little sparkle is always a perfect touch for Christmas cards!


We hope you leave today feeling inspired!   Have a great week! 

Monday, May 31, 2010

~Strawberry Fields jewelry holder tutorial~ by Bridget Baxter

Today's Monday Creative Team Member Spolight is a tutorial by our talented, Bridget Baxter. She shares with us a gorgeous tutorial to create a jewelry holder out of some fun and unique supplies. Bridget chose to work with our Strawberry Fields button collection.

Photobucket
                                       
Enjoy this tutorial. I hope you leave today feeling inspired! I know I am looking forward to creating one!

~Strawberry Fields jewelry holder tutorial~


You’ll need an inexpensive frame (mine is  5 x 12”),  scrap wood cut to fit the inside of the frame, scrapbook paper or fabric, Mod Podge, a 7/16” dowel, a 5/16” dowel, two 7/8” cup hooks, wooden spools of thread,


Cut the 7/16” dowel down to a length that works for you, mine just happens to be 9 1/4” long and paint it.

Cut your 5/16” dowel into three 1 1/2” long pieces.These are your pegs to keep your spools on.  Drill holes in the bottom section of your board for the pegs.  Screw your cup hooks into the top of your board so everything is spaced nice and evenly.

Then put your pegs in the bottom holes and push the thread spools on.  Thread your painted dowel into the cup hooks. Now we get to the fun part!  Glue those adorable buttons on the ends of the spools and then glue the back on.  I used E 6000.  You can add a picture hanger to the back if you want or use plate stands to prop it up.
 
Now stand back and admire your pretty new jewelry holder.  The dowel is perfect for rings or earrings and the bottom pegs hold your bracelets and necklaces.

Monday, May 24, 2010

Amy's Ipad Case & 9 New Button Styles In The Shop!

Creative Team member, Amy priddy shares with us today a gorgeous Ipad case she created using fabric and our "Buttons & Links" collection. Buttons & Links includes a set of lovely sunshine yellow and raspberry buttons with swarovski crystal elements and hand painted details.

While Amy sells these fun accessories, this would be a fun project to do on your own! Simply Trace around your Ipod, Itouch or Ipad, measure and create your own pattern and let your creativity guide! Just think of all of the accessories you could create!  But, if you are like me and would rather have someone else design one that is professional and totally functional....see Amy :) 

I just love the colors of the fabric are fresh and a perfect summer time accessory.
Amy has included extra padding throughout to help protected your beloved Ipad ;)
Thanks, Amy for sharing such a pretty project with us!

Lastly, 9 new button collections!  We have been struggling to find time to create new buttons with all of the orders of buttons and custom button orders we've been receiving, but over the last month we've been taking time a little bit each week to create new styles. Yesterday we realized that we had 9 new styles to debut and so we updated the shop!

Enjoy!


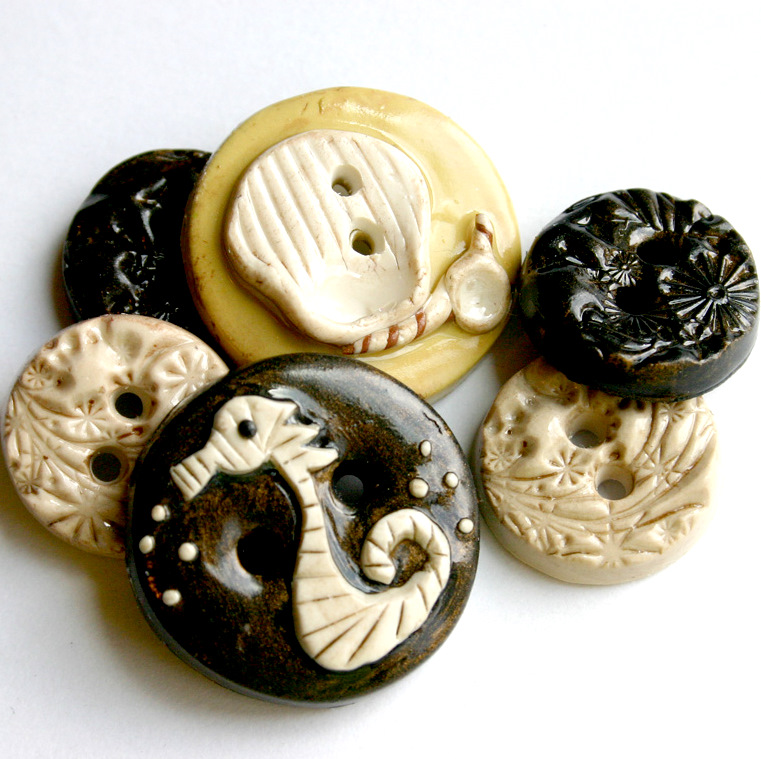
Vintage Seahorse- Sandy hues, lightly washed with a gold to create a beautiful vintage feel.

"I Will Follow You" A mamma and her little baby bug.

Mr. Owl-  A cute retro-color inspired set of buttons perfect for gender neutral projects

Red Roses- The heart button filled with tiny, intricate roses is just over 1 3/8" in size. A beautiful focal button for a knitted beanie or sweater. My sister is getting married in October and these are her wedding colors, so this set was most definitely inspired by her wedding :)


Lady Turtle- A cute little lady turtle in a pink hat and flowers

Lacey- This set of buttons includes (1) 1 1/2" Jumbo sized button. A Chantille lace texture was applied over a pearl button and aqua and red accents were added for a lovely timeless button set.

Brownie The Bear- Another adorable set with a nice 1 1/2" sized focal button.

Remember that all of our buttons are fully customizable in size and color. If you love a set, but have nothing to match it, contact us, we would love to create just what you need.

Have a wonderful week!  The button shop will be working from the Oregon Coast all next week. More about that later :)

XOXO Tessa Ann