Turn an old Crystal Light container into a fun and fabulous tools storage container.
Supplies:
Crystal Light container
Mod Podge;
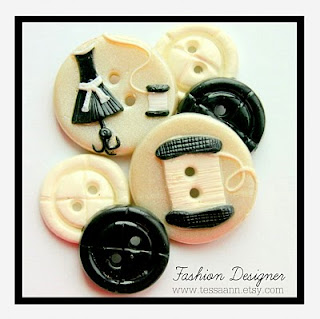
Tessa Ann Buttons- "Fashion Designer" can be found here
Coordinating thread (optional);
Craft glue;
9 inch x 7 inch piece of fabric, scrapbook paper or wrapping paper;
9 inch long piece of ribbon (any width);
Scissors;
Iron (if using fabric);
Foam Brush
Taking your 9x7 piece of fabric, fold one side of the longest edge 1/4 of an inch under (wrong sides facing) and iron. If using scrapbook paper or wrapping paper, just fold over and press good with your fingers to cause a crease.
Line up the folded edge of your paper or fabric to the bottom of the container and use your finger at the top of the container to measure where to do the top fold.
Fold the fabric or paper over and iron or finger press. If you are using fabric, you can top-stitch the folded edges for a more finished look. Once that is done, fold one of the shortest edges under 1/4 of an inch (wrong sides facing) and press. Three of the four sides should be folded over now.
Remove plastic Crystal Light label from the plastic container. Once label is removed, using your foam brush, brush the Mod Podge directly on to the Crystal Light plastic container. Make sure you get it good from top to bottom. Once the Mod Podge is on, line up the unfolded edge of the fabric or paper with the center of one side of the container. Gently stretch the paper/fabric around the container pulling tight so there are no wrinkles all the way around until you get to where you started. The folded edge should overlap the raw edge a little. Add a little Mod Podge to the end of the fabric (the folded seam) and press with your finger in place.
{OPTIONAL:} You can use Mod Podge to seal the fabric or paper once it is on the container. If using paper, I recommend putting another coat on top of the paper. It is optional with fabric as the Mod Podge will make the fabric stiff.
Once that is done, take your ribbon and seal or treat the ends of the ribbon. You can use either Fray Check or heat sealing it using a lighter. This will prevent the ribbon from fraying. Once that is done, brushMod Podge on the backside of the ribbon. Repeat the lining up process you did for the fabric/paper until the ribbon overlaps like the fabric did. You can place the ribbon anywhere you want on the container. I chose the top portion of the container. Set aside to dry.
{OPTIONAL:}
While that is drying, take your coordinating thread and feed through your button as many times as it takes to get the desired look. Make sure you cut enough thread to leave tails long enough to tie in knots (at least one inch extra for each end). I wound mine around about 4 times for a thicker threaded look. Once you get the look you are going for, tie at the back 2 or 3 times and snip close to knots. Repeat for however many buttons you want to use.
Once the fabric/paper is dry, using your craft glue (I used E-6000), put a small bead on the back of the button and adhere to the ribbon. Repeat for the remainder of the buttons. Once that dries, you are all set! A new storage holder to keep tools handy. Perfect for pens, scissors, rulers, etc.....

